Alright, so you’re an amateur athlete dreaming of that big break, huh? Maybe you’re just starting out, or you’ve been grinding for a while but no one’s really noticed yet. Well, buckle up, because making a killer highlight reel is your golden ticket to get scouted, impress coaches, or just flex your skills on social media. But don’t get it twisted — this isn’t about slapping together random clips and hoping for the best. It’s about crafting a story that screams, “Hey, look at me!” without sounding desperate.
First off, why even bother with a highlight reel? In a sea of hopefuls, scouts and coaches barely have time to watch full games. They want the juiciest bits, the moments that make you stand out. A good reel is like your personal trailer — it’s quick, sharp, and leaves them wanting more. Plus, it’s a great way to track your own progress and celebrate those clutch plays.
But hold your horses! Before you grab your phone and start filming every single thing, you gotta plan. Not every play deserves a spot on your reel. That missed shot? Nah. The sloppy pass? Pass on that too. Focus on moments that highlight your skills, athleticism, and game IQ. Think quality over quantity.
| Planning Your Reel | Key Tips |
|---|---|
| Identify your strengths | Pick plays that showcase your best skills (speed, accuracy, defense, etc.) |
| Set a time limit | Keep it around 2-3 minutes, nobody wants to watch your entire game tape |
| Get multiple angles | Different perspectives can make your plays pop |
Now, equipment — don’t stress if you don’t have a Hollywood budget. A smartphone with a decent camera can do wonders if you know how to use it. Tripods, good lighting, and a quiet environment help, but hey, if you’re outdoors and the sun’s shining, you’re already winning half the battle. Just avoid shaky footage — nothing kills a reel’s vibe faster than a camera that looks like it’s been through a tornado.
When filming, angles and lighting are your best friends. Shoot from behind the goal or sideline for action-packed shots. Natural light is your BFF; avoid harsh shadows or overexposure. Pro tip: film in landscape mode, not portrait, unless you want your reel to look like a vertical mess on YouTube.
- Essential filming tips:
- Use slow-motion on key moments to emphasize skill
- Capture reactions and celebrations — personality sells
- Keep clips short and sweet
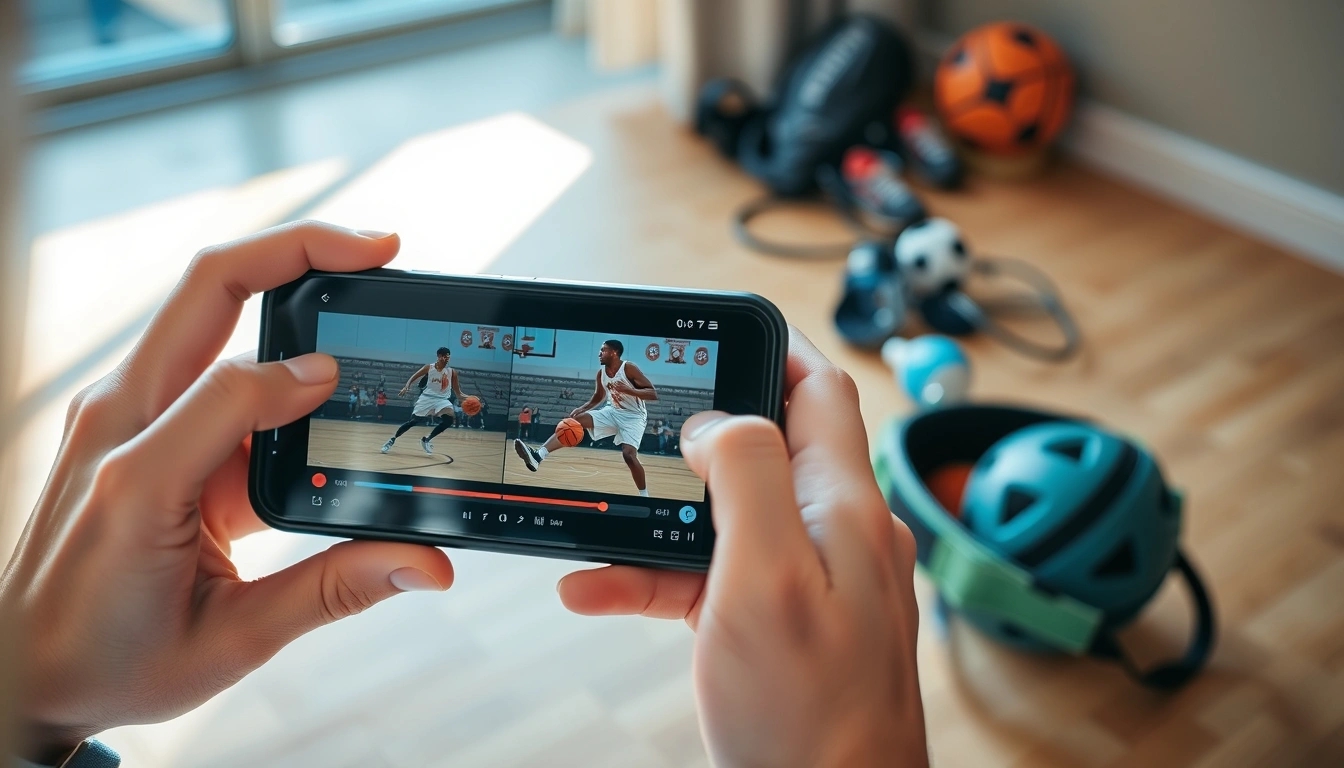
Editing is where the magic happens, but don’t freak out if you’re not a tech wizard. Free software like iMovie or DaVinci Resolve can do the trick. The goal? Make your reel flow smoothly without looking like a chaotic montage. Cut out dull moments, add simple transitions, and keep the pace tight.
Music and effects can hype up your reel, but tread carefully. A banging soundtrack can pump up the energy, but too many effects? Instant cringe. Balance is key — think subtle, not a fireworks show.
Remember, less is more. A 2-3 minute reel packed with your best plays beats a 10-minute snoozefest any day. And whatever you do, avoid these rookie mistakes:
- Shaky or blurry footage
- Including irrelevant or repetitive clips
- Over-editing with too many effects
- Ignoring feedback from others
Finally, once you have your masterpiece, share it smartly. Platforms like YouTube, Hudl, or even Instagram are great for exposure. Tag coaches, teams, or recruiters if you can. And don’t just post and ghost — ask for feedback, learn, and make your next reel even better.
So yeah, creating a highlight reel isn’t rocket science, but it takes some thought, effort, and a bit of flair. Nail these steps, and who knows? Your reel might just be the thing that flips your sports career from “just another player” to “someone to watch.”
Why a Highlight Reel Matters
Alright, let’s get real for a second — if you’re an amateur athlete dreaming big, a highlight reel isn’t just some flashy video to toss on your Instagram and hope for likes. Nope, it’s your golden ticket to getting noticed by scouts, coaches, and even that one cousin who always brags about his high school football days. Seriously, in today’s sports world, where everyone and their dog is trying to make it, a well-crafted highlight reel can be the difference between being just another face in the crowd or the next big thing.
Think about it: scouts and coaches don’t have time to watch every single game you’ve played (and honestly, neither do your friends). They want the best of the best. Your highlight reel is like your personal sports trailer — it shows off your skills, your hustle, and your unique style in a matter of minutes. It’s basically your sports resume, but way cooler and a lot more fun to watch.
- Catch Their Eye Quickly: In a sea of athletes, first impressions matter. A crisp, well-edited reel grabs attention faster than a slow-motion dunk.
- Control Your Narrative: You get to decide which moments define you — whether it’s that insane goal, a slick assist, or a defensive play that left everyone speechless.
- Share Your Passion: It’s not just for scouts. Friends, family, and teammates love reliving those epic moments, and a highlight reel makes it easy.
| Benefit | Why It Matters | Pro Tip |
|---|---|---|
| Visibility | Gets you noticed by people who can open doors | Keep it under 3 minutes to maintain interest |
| Self-Promotion | Highlights your strengths and unique skills | Include a mix of plays that show versatility |
| Motivation | Boosts confidence seeing your progress | Update your reel regularly to track growth |
Now, I won’t sugarcoat it — creating a highlight reel can feel like a headache. You’re probably thinking, “Where do I even start? What if my footage sucks?” Trust me, everyone’s been there. But here’s the kicker: you don’t have to be a pro videographer to make a reel that stands out. It’s about showcasing your best moments, not filming a Hollywood blockbuster.
Also, let’s not forget the power of storytelling. A highlight reel isn’t just random clips slapped together. It’s your journey, your grit, your hustle packed into a few minutes. It’s what makes coaches lean in and say, “Hey, this kid’s got potential.” So, if you’re still on the fence about making one, just remember — every pro started somewhere, and their highlight reel was probably the first step.
In short? Don’t sleep on the power of a highlight reel. Whether you want to catch the eye of a college scout, impress your coach, or simply brag a little, it’s your best bet. So grab that camera, pick your best plays, and start telling your story — because no one else will do it for you.
Planning Your Highlight Reel
Alright, before you go all trigger-happy with your camera, let’s pump the brakes and talk about planning. Because, honestly, not every moment on the field or court deserves a starring role in your highlight reel. I mean, sure, that one time you tripped over your own feet? Probably best left on the cutting room floor. Planning your reel isn’t just about capturing footage; it’s about capturing the right footage.
You gotta think like a storyteller here. What moments tell your story best? What plays scream, “Hey, look at me!”? It’s tempting to film everything, hoping the magic happens somewhere in there, but trust me, that’s a rookie move. Instead, make a game plan for what you want to showcase. Are you a slick dribbler, a powerhouse shooter, or a defensive beast? Pinpoint your strengths and focus on those moments.
- Scout your footage: Watch past games and identify your top plays.
- Set goals: Decide what message you want your reel to send.
- Communicate with your filmer: If you have someone recording, brief them on what to zoom in on.
Now, here’s a little secret: not every play is highlight material. Seriously, some plays are just… meh. Maybe you made a decent pass, but if it doesn’t pop, it’s gotta go. Your reel should be like a rollercoaster ride—thrilling, fast-paced, and leaving the viewer wanting more. Boring clips are like that one friend who drones on about their weekend—nobody’s got time for that.
| Type of Play | Include? | Why or Why Not? |
|---|---|---|
| Game-winning shot | Yes | Showcases clutch performance under pressure. |
| Average pass | No | Lacks impact and excitement. |
| Defensive block | Yes | Highlights athleticism and game awareness. |
| Missed shot | Rarely | Only if it leads to a great rebound or play. |
Also, be mindful of the length of your footage. Don’t flood your reel with endless clips. Keep it tight and punchy. Think of your reel as a trailer for a blockbuster movie, not the entire film. You want scouts and coaches to be impressed, not bored to tears.
One more thing—don’t forget to capture those unexpected gems. Sometimes, the best moments are the unplanned ones: a quick steal, a perfect assist, or a hustle play that shows your heart. These little nuggets can set you apart from the crowd. So, while planning is key, leave a little room for spontaneity.
In the end, planning your highlight reel is about being selective, strategic, and a tad bit ruthless. It’s your chance to show off your best self, so make every second count. Now, go out there and start capturing those moments that make you shine—just remember, not every moment deserves a spot on the reel. Trust me, your future self will thank you.
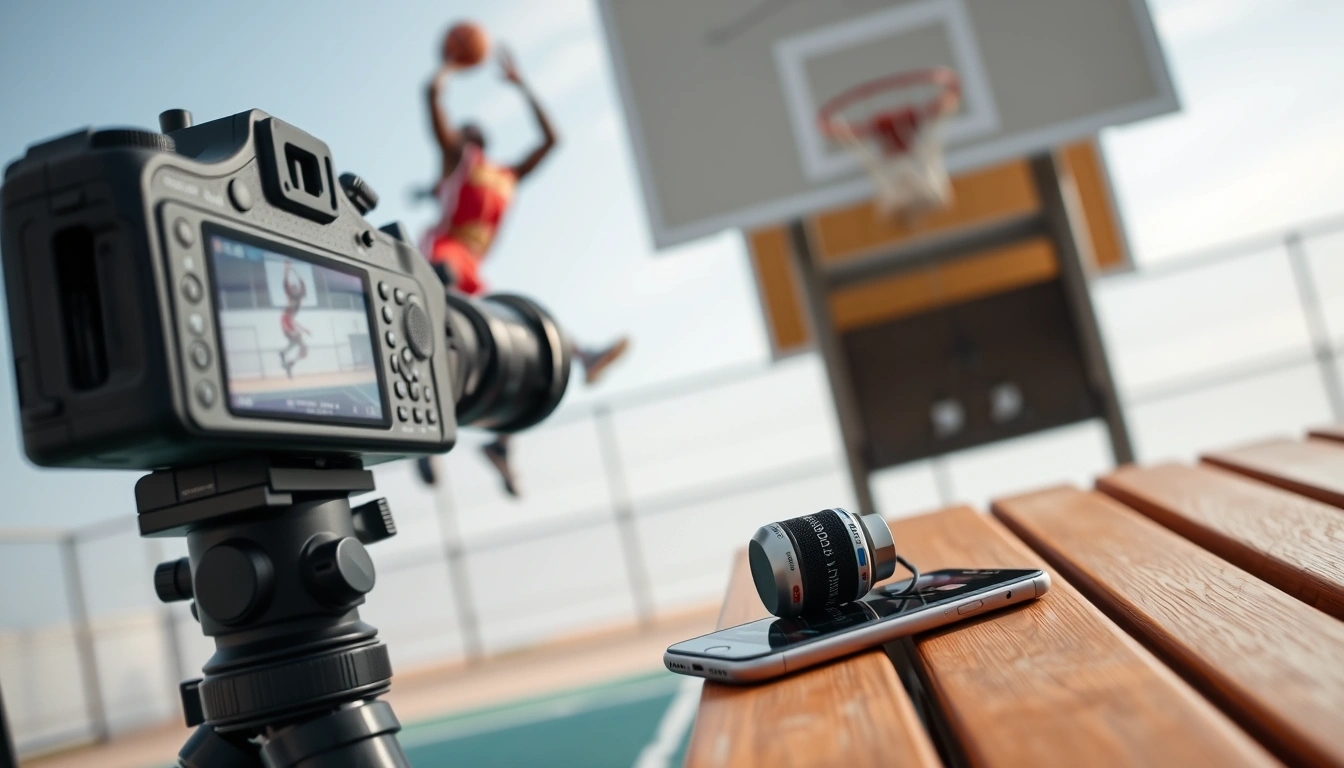
Essential Equipment for Recording
Look, you don’t need to break the bank or hire Spielberg to get a decent highlight reel. But don’t get me wrong — some gear really does make a difference. If you’re just whipping out your phone and hoping for the best, well, that can work sometimes, but it’s a bit like trying to bake a cake without flour. Sure, you might get something edible, but it ain’t gonna be great.
First things first: a decent camera. Now, before you roll your eyes and say, “I got my phone, that’s good enough,” hear me out. Modern smartphones have surprisingly good cameras, especially the newer models with 4K video. But if you want to step it up a notch, consider a budget-friendly action camera like a GoPro or DJI Osmo Action. These bad boys are rugged, easy to mount, and capture smooth footage. Plus, they handle motion like a champ — no one wants a highlight reel that looks like it was shot during an earthquake.
| Equipment | Why It Matters | Price Range |
|---|---|---|
| Smartphone (latest models) | Convenient, good quality video, easy editing apps | Free if you already have one |
| Action Camera (GoPro, DJI) | Durable, great stabilization, wide-angle lens | $150 – $400 |
| Tripod or Stabilizer | Steady shots, avoids shaky footage | $20 – $100 |
| External Microphone | Clear audio for commentary or ambient sounds | $30 – $80 |
Now, about tripods and stabilizers — don’t overlook these little lifesavers. Shaky footage is like nails on a chalkboard for scouts and coaches. No one’s gonna sit through a reel that looks like it was filmed by a hyperactive squirrel. Even a simple tripod can do wonders, and if you’re moving around a lot, a gimbal stabilizer can smooth out those bumps. It’s not fluff, I promise.
Oh, and lighting? It’s a sneaky one. You might think natural daylight is all you need (and it often is), but shooting during golden hours (early morning or late afternoon) gives your videos that pro vibe without spending a dime. If you’re stuck indoors or in the shade, a ring light or portable LED panel can brighten things up without frying your budget.
- Pro tip: Avoid zooming in too much — digital zoom kills quality.
- Use wide angles to capture the full action.
- Keep your battery charged and have extra memory cards ready.
And let’s not forget sound equipment. Sure, your highlight reel might be mostly about visuals, but if you want to add commentary or capture the crowd’s hype, an external microphone can make a huge difference. Built-in mics on phones and cameras are okay, but they pick up all sorts of background noise and wind. A simple lapel mic or shotgun mic can clean up your audio dramatically.
So, here’s the bottom line: you don’t need a Hollywood setup, but skimping on gear altogether? That’s a rookie move. Invest a little, get some basics down, and your highlight reel will look like you actually know what you’re doing — even if you’re just starting out.
Remember, it’s not about having the fanciest equipment, but using what you’ve got smartly. And hey, if you’re on a shoestring budget, just start with your phone and a steady hand, then upgrade as you go. Rome wasn’t built in a day, and neither is a killer highlight reel.
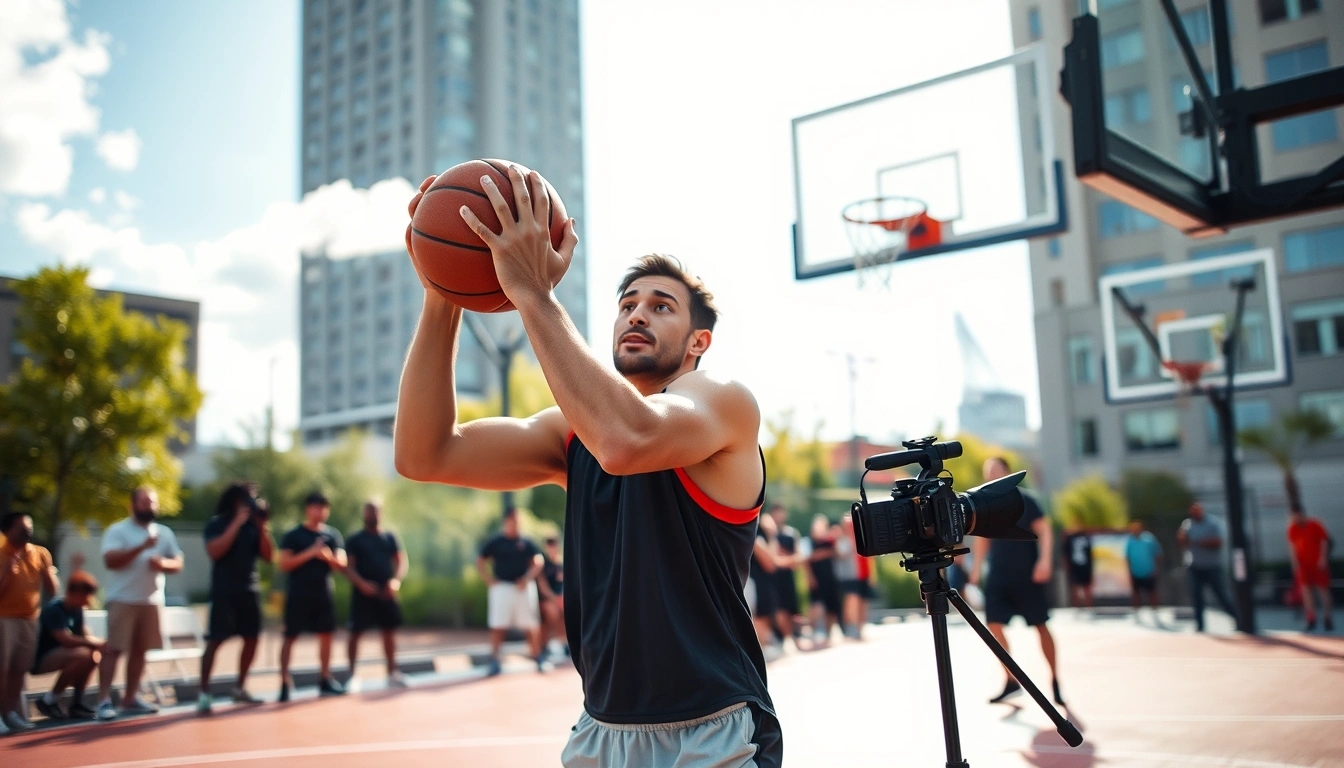
Filming Tips: Angles and Lighting
So, you’ve got your smartphone ready and you’re pumped to shoot some footage for your highlight reel — but hold up! Before you just start hitting record like there’s no tomorrow, let’s chat about something that can seriously make or break your clips: angles and lighting. Trust me, you don’t have to be Spielberg to get this right, but a little know-how goes a long way.
First off, angles. Everyone thinks the best shot is the one right in front of the action, but nah, that’s just the start. Different angles can tell a totally different story. For example, shooting from a low angle can make you look like a beast on the field — bigger, stronger, more dominant. Meanwhile, a side angle can really show off your speed and technique. And don’t forget about the overhead or drone shots if you can swing it; they give a slick overview of the play that’s just *chef’s kiss* perfect for highlight reels.
- Low angle: Emphasizes power and dominance
- Side angle: Highlights speed and movement
- Overhead shot: Great for tactical views
- Tracking shot: Follows the action smoothly
Now, lighting — oh boy, this one’s a sneaky beast. You might think “I’m outside, the sun’s shining, I’m golden,” but it’s not always that simple. Direct sunlight can cause harsh shadows and squinting faces, which is about as flattering as a soggy sandwich. Your best bet? Shoot during the “golden hour” — that magical time just after sunrise or before sunset when the light is soft, warm, and downright dreamy. If you’re shooting indoors, try to position yourself near a big window or use some simple lamps to avoid dark, grainy footage.
| Lighting Condition | Pros | Cons |
|---|---|---|
| Golden Hour (Sunrise/Sunset) | Soft, warm light; flattering shadows | Limited time window |
| Midday Sun | Bright and clear | Harsh shadows; squinting |
| Overcast Day | Even, diffused light | Can look dull or flat |
| Indoor with Window Light | Natural and soft | Limited movement; shadows if poorly placed |
One more thing — don’t just stand still and expect magic. Move around! Try different spots and angles before you lock in your shot. Sometimes, what looks good to your eye might be a total flop on camera. And if you’re using a smartphone, use the gridlines feature to keep your shots balanced and level — crooked footage is a quick way to scream “amateur.”
Pro Tip:- Lock your exposure and focus on your phone to avoid the annoying auto-adjusting during a play.- Use a tripod or stabilizer if you can; shaky footage is a no-go.- Experiment with slow-motion for those jaw-dropping moments.
At the end of the day, angles and lighting are your secret weapons. Nail these, and your highlight reel will look way more polished, even if you’re just filming in your backyard with your phone. So, next time you hit record, remember: it’s not just what you film, but how you film it that counts. Now get out there and shoot like a pro — or at least fake it till you make it!
Choosing the Best Plays
Alright, let’s cut to the chase: not every move you make on the field or court is highlight reel material. Seriously, just because you *scored* doesn’t mean it deserves a spot in your showcase. I mean, come on, a lucky bounce or a sloppy pass that somehow turned into a goal? Nah, that’s not the kind of stuff that’ll make scouts stop scrolling. So how do you figure out which plays actually show off your skills and personality? Let’s break it down.
First off, focus on quality over quantity. Your highlight reel isn’t a blooper reel, so skip the easy or routine plays. Instead, pick moments where you’re clearly in control—making smart decisions, showing off agility, or making a play that’s just plain impressive. Think about plays where you’re making defenders look silly or where your skill level shines through without any question. It’s those “wow” moments that get people talking.
- Impactful plays: Goals, baskets, or touchdowns that change the momentum of the game or demonstrate clutch performance.
- Skill showcase: Plays where you’re dribbling past opponents, making sharp passes, or pulling off tricky moves that require serious talent.
- Game awareness: Smart plays—like reading the defense, intercepting passes, or positioning yourself perfectly—that show you’re more than just raw talent.
Now, here’s a little secret: personality matters. Your highlight reel is your chance to tell a story about who you are as a player. Are you aggressive? Calculated? Flashy? Calm under pressure? Include plays that reflect these traits. If you’re the kind of player who’s all about hustle and grit, toss in a few hustle plays—diving for loose balls, chasing down opponents, or making that crucial block. It’s not always about the flashy stuff.
| Play Type | Why Include It? | Example |
|---|---|---|
| Highlight-worthy | Shows peak skill and athleticism | Game-winning goal, buzzer-beater |
| Smart play | Demonstrates game IQ and awareness | Perfectly timed interception or assist |
| Personality-driven | Reveals your unique playing style | Relentless hustle, leadership moments |
Don’t forget, context is king. A solo goal in a meaningless scrimmage probably won’t impress anyone. But a similar goal in a tight, competitive game? That’s a keeper. If possible, add brief captions or graphics to your clips that explain the situation—like the score, time left, or why the play mattered. It helps scouts and coaches understand the stakes and appreciate your performance more.
And one last thing—cut the fluff. Avoid long clips of you jogging, standing around, or celebrating (unless your celebration is truly iconic, of course). Keep it tight, keep it relevant, and keep it real. Your reel should feel like a fast-paced highlight show, not a slow-motion documentary.
So yeah, picking the best plays isn’t rocket science, but it does take some honest self-assessment and a bit of ruthless editing. Remember: your highlight reel is your personal brand. Make sure it screams, “This is who I am. This is what I’m about.” Otherwise, it’s just another boring video lost in the endless sea of sports clips.

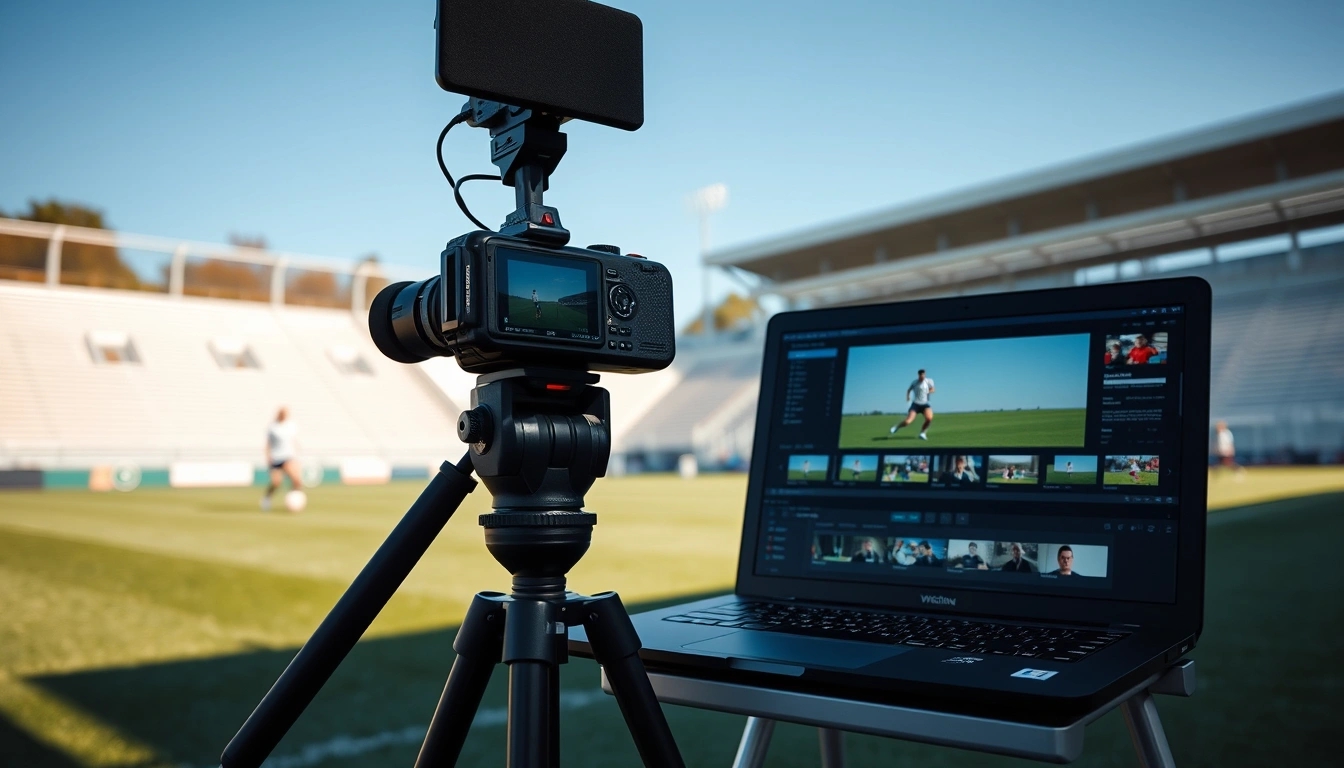
Editing Basics for Beginners
Alright, let’s get real for a second — editing your highlight reel isn’t some rocket science experiment reserved for Hollywood pros. Nope, you don’t need a fancy degree in film studies or a closet full of expensive software to whip up something that looks slick and keeps eyes glued. The truth is, with a little patience and some smart choices, even a total newbie can create a reel that flows smoothly and shows off your skills without turning into a chaotic mess.
First things first: keep it simple. Overcomplicating your edits with flashy transitions and effects can backfire big time. Instead, focus on clean cuts and smooth flow. Think about your reel like a story — you want it to make sense and keep the viewer engaged, not dizzy or overwhelmed. There’s a bunch of free or cheap software out there that’s perfect for beginners. Stuff like iMovie, Shotcut, or DaVinci Resolve can handle basic trimming, cutting, and even some color correction without needing a manual thicker than a phone book.
| Software | Best For | Cost | Ease of Use |
|---|---|---|---|
| iMovie | Apple users, simple edits | Free | Very beginner-friendly |
| Shotcut | Cross-platform, basic editing | Free | Moderate learning curve |
| DaVinci Resolve | Advanced color correction, pro features | Free & Paid versions | Steeper learning curve |
Now, let’s talk about trimming and sequencing. This is where a lot of people trip up. You might have hours of footage, but trust me, not every second belongs in your reel. Chop out the fluff and keep only the plays that actually wow. No one wants to watch you jog around the field for two minutes. Keep clips short — like 5 to 10 seconds tops — so the reel stays punchy and fast-moving.
- Tip 1: Cut out any shaky or blurry parts. If it looks like a toddler holding the camera, toss it.
- Tip 2: Use jump cuts to move quickly between plays without awkward pauses.
- Tip 3: Avoid overusing transitions like flashy wipes or spins — they can get distracting fast.
Another thing — don’t be afraid to experiment with pacing. Sometimes slowing down a key play for a second or two can highlight your skills better, but don’t drag it out. The goal is to keep the viewer hooked, not bored out of their mind. And if you’re feeling fancy, a subtle zoom or pan can add some life but remember: less is more.
Example Editing Workflow:1. Import your clips into the software.2. Watch all footage and mark best plays.3. Trim clips to 5-10 seconds.4. Arrange clips in a logical, exciting order.5. Add simple transitions (like crossfade).6. Adjust brightness/contrast if needed.7. Export your reel in HD quality.
One last nugget — always preview your reel multiple times before calling it done. What seems cool at 2 AM might look sloppy in daylight. Show it to a buddy or two for feedback (preferably someone who won’t just say “cool” to be nice).
To wrap it up: editing is about making your highlight reel look effortless, but that takes some effort. Stick with simple tools, focus on clean cuts, and don’t overdo it with bells and whistles. Your reel should scream “look at me” without shouting “I tried too hard.” Now, get out there and start cutting — your future self (and maybe a scout) will thank you for it.
Adding Music and Effects
When it comes to to your highlight reel, you’re walking a fine line between electrifying your footage and turning it into a chaotic mess. Let’s be honest, slap on the wrong tune or overdo the special effects, and you might as well have handed scouts a headache wrapped in a cringe package. The key? Strike a balance that enhances your plays without stealing the spotlight.
First off, the music choice is everything. You want a track that pumps up the energy but doesn’t distract. Think of it like seasoning a meal — too little, and it’s bland; too much, and it’s inedible. A fast-paced beat can hype up those slick moves and game-winning shots, but if the song’s too busy or has lyrics that clash with your vibe, it’ll pull attention away from your skills.
- Tip 1: Go for instrumental or low-key tracks that build momentum without overpowering the visuals.
- Tip 2: Match the tempo of the music to the pace of your plays. Slow motion? Maybe a mellow tune. Fast breaks? Crank up the energy.
- Tip 3: Avoid trendy songs that might be overplayed or get flagged for copyright issues — your reel could get taken down faster than you can say “highlight.”
Now, about effects — yes, they can add flair, but here’s the catch: less is more. Flashy transitions, wild zoom-ins, or a barrage of filters might seem tempting, but they often distract more than impress. Your highlight reel should scream “Look at my skills!”, not “Look at my editing software!”.
| Effect Type | When to Use | When to Avoid |
|---|---|---|
| Slow Motion | To emphasize a spectacular move or crucial moment | Overusing on every play, making the reel drag |
| Jump Cuts | To keep the pace snappy and exciting | When it makes the footage confusing or choppy |
| Color Filters | To unify the look or add mood | When they distort the visibility or look unnatural |
One practical insight here: always preview your reel with fresh eyes or better yet, get a friend’s opinion. Sometimes what sounds epic to you might just be noise to others. And don’t forget volume levels — music shouldn’t drown out any important sounds like calls or crowd reactions that add authenticity.
To wrap it up, adding music and effects is like seasoning your highlight reel — done right, it turns good plays into unforgettable moments. Done wrong, and well, you’re just background noise. So, keep it simple, keep it real, and let your skills do most of the talking.
Keeping it Short and Sweet
Let’s be honest — nobody’s got the patience to sit through a 10-minute highlight reel that feels more like a slow-motion replay marathon. Long reels? They’re basically the video equivalent of watching paint dry. Short and punchy is where it’s at. Why? Because scouts, coaches, and even your buddies want the good stuff fast, not a drawn-out saga of every single play you’ve ever made.
Think of your highlight reel like a trailer for a blockbuster movie. You wouldn’t show every single scene, right? You pick the best bits that get people hyped and begging for more. That’s exactly how you want your reel to feel — exciting, gripping, and making viewers think, “Wow, this player’s got something special.”
- Tip 1: Aim for 1 to 3 minutes max. Yes, it’s tough to cut down, but trust me, less is more.
- Tip 2: Start strong. Open with your most jaw-dropping play because first impressions count big time.
- Tip 3: Keep the pace moving. Ditch the slow-mo unless it’s a game-changer moment — too much of it kills the vibe.
| Common Mistake | Why It’s a Problem | How to Fix It |
|---|---|---|
| Too many average plays | Viewers get bored fast and lose interest | Be ruthless — only pick your best, most impressive moments |
| Over-editing with flashy effects | Distracts from your actual skills | Keep effects minimal and tasteful |
| Ignoring audio | Background noise or awkward music ruins flow | Choose clean audio or subtle music that complements, not overpowers |
Here’s a little secret: the attention span of your audience is shorter than you think. Scouts skim through dozens of reels weekly — if yours drags on, they’ll move on faster than you can say “highlight.” So, keep it snappy, keep it exciting, and keep it real.
And hey, don’t stress about making it perfect. Sometimes the charm is in the imperfections — a little rawness can show personality and hustle. Just don’t let it turn into a sloppy mess. Strike that balance between polished and authentic.
Quick recap to keep your highlight reel punchy:- Keep total length under 3 minutes- Open with your absolute best play- Cut out filler and boring clips- Use minimal slow-mo and effects- Pick background music wisely- Maintain a steady, engaging pace
Remember, your highlight reel is your personal highlight party — make it something people want to watch, share, and remember. Keep it short, sweet, and packed with the plays that scream “I’m the real deal.” Because at the end of the day, if your reel bores people, it’s game over before it even started.
Common Mistakes to Avoid
Look, creating a highlight reel might sound like a breeze—just slap some clips together and boom, you’re the next big thing, right? Well, not quite. There’s a minefield of rookie mistakes lurking around every corner, ready to make scouts bounce faster than you can say “goal.” So, let’s get real about what to dodge if you want your reel to stand out for the right reasons.
First up: shaky footage. Nothing screams “amateur hour” louder than clips that look like they were shot during an earthquake. If your video is wobbling all over the place, it’s not just annoying—it’s a distraction. Scouts want to see your skills, not get seasick. If you don’t have a tripod or stabilizer, try propping your camera on something steady or ask a mate with a steady hand to help out. Trust me, your eyes (and theirs) will thank you.
| Mistake | Why It Hurts | Easy Fix |
|---|---|---|
| Shaky footage | Distracts from your skills, looks unprofessional | Use a tripod or steady surface |
| Irrelevant clips | Wastes time, bores viewers | Only include your best plays |
| Over-editing | Feels cheesy, can obscure actual talent | Keep effects minimal and tasteful |
Next, irrelevant clips. Here’s where many stumble: thinking every moment on the field is highlight-worthy. Spoiler alert—it’s not. That slow jog back after a missed shot? Nope. That awkward fumble? Definitely not. Your reel isn’t a diary; it’s your personal highlight showcase. Trim ruthlessly. Only the plays that scream “look at me!” deserve airtime. If it doesn’t show off your skills or hustle, cut it out.
Okay, now let’s talk about over-editing. We get it, flashy effects and music can be tempting. But piling on transitions, filters, and sound effects like you’re directing a Hollywood blockbuster? That’s a no-go. It often backfires, making your reel look like a cheesy commercial rather than a genuine display of talent. Scouts want to focus on your moves, not your editing skills. Keep it clean, crisp, and let your performance do the talking.
- Tip #1: Use simple cuts and fades.
- Tip #2: Match music tempo to your gameplay pace.
- Tip #3: Avoid distracting text or excessive slow-mo.
And hey, don’t forget about the length. A highlight reel that drags on is like a bad date—boring and best ended early. Keep it punchy and under 3 minutes. Think of it as a trailer, not the whole movie.
Finally, one last pitfall to dodge: ignoring feedback. You might think your reel is fire, but getting a second opinion can save you from embarrassing slip-ups. Share it with coaches, teammates, or even that brutally honest friend who won’t sugarcoat stuff. Their insights can help you polish your reel to perfection—or at least close enough.
In the end, your highlight reel is your chance to shout, “Hey, I’m worth watching!” So avoid these common mistakes, keep it real, and you’ll be turning heads in no time.
Remember:- Steady shots > shaky chaos- Quality clips > quantity overload- Simple edits > flashy disasters- Short & sweet > marathon reels- Listen to feedback > avoid ego traps
Sharing Your Highlight Reel
So, you’ve poured sweat, time, and maybe a few tears into crafting your highlight reel. Now what? Just toss it on the internet and hope for the best? Nah, that’s not how you get noticed. The real game begins when you share your reel smartly to grab the attention of coaches, scouts, or even just your buddies who’ll finally stop doubting your mad skills.
Where to Share?
Let’s start with the obvious: social media. Platforms like Instagram, TikTok, and Facebook are gold mines for quick exposure. Instagram’s reels feature is perfect for short clips, while TikTok’s algorithm can push your video to thousands overnight if you play your cards right. Facebook groups dedicated to your sport or local teams can also be surprisingly effective. Don’t sleep on YouTube either—longer reels live here and it’s the go-to for serious scouting eyes.
| Platform | Best For | Tips |
|---|---|---|
| Short, eye-catching clips | Use hashtags, tag relevant teams/players | |
| TikTok | Viral potential, younger audience | Engage with trends, keep it snappy |
| YouTube | Full-length reels & detailed content | Optimize titles, descriptions, use thumbnails |
| Community sharing, local reach | Join sport groups, post regularly |
How to Maximize Reach?
Posting once and ghosting? Rookie move. You gotta be persistent but not annoying. Share your reel multiple times, tweak captions, and try different posting times to see what clicks. Engage with comments—yes, even if someone trolls you, keep it cool and professional.
- Tag relevant people: Coaches, teammates, and even local sports pages.
- Use hashtags smartly: #HighlightReel, #RisingStar, #YourSportName – but don’t overdo it.
- Cross-promote: Share your reel across all your social platforms.
- Ask for shares: Sometimes, a simple request to your network can boost views.
And hey, don’t forget about email. Send your reel directly to coaches or scouts with a brief, polite intro. It’s old school but still effective.
One Last Thing
Remember, your reel is a living thing—it can and should evolve. Keep track of what works and what flops. If you get feedback, good or bad, use it. The best players don’t just play hard; they learn hard too. So, get out there, share your story, and maybe next time, that highlight reel will land you that dream spot on the team.
In summary:
1. Choose the right platforms based on your reel’s length and audience.2. Engage actively—post, comment, tag, and share.3. Be patient but persistent; success rarely comes overnight.4. Use feedback to sharpen your next reel.
Now, go make some noise with that reel of yours. The spotlight’s waiting.
Using Feedback to Improve
Alright, so you’ve just dropped your highlight reel online, feeling like a champ, right? Well, hold up a sec — don’t just post and ghost. That’s rookie stuff. If you really want to level up your game and make your next reel shine brighter than your last, you’ve gotta embrace feedback. Yes, that sometimes brutally honest, “Hey, maybe don’t show that blooper twice” kind of feedback.
First things first, gathering feedback isn’t just about fishing for compliments. It’s about getting the real-deal opinions from people who actually know their stuff — coaches, teammates, even random sports junkies who won’t sugarcoat it. You can use social media comments, direct messages, or even better, ask your friends to watch and tell you what hits and what misses. Trust me, that one friend who always says, “Eh, could be better,” might be your secret weapon.
| Source | Type of Feedback | Why It Matters |
|---|---|---|
| Coaches | Technical & Tactical | They see the game from a pro lens; their advice can boost your skills and highlight real strengths. |
| Teammates | Practical & Relatable | They know your style and can point out what feels authentic or forced in your reel. |
| Online Audience | General Appeal & Engagement | Gives you a sense of what catches attention and what makes viewers scroll past. |
Once you’ve got your feedback, don’t just stash it away like some forgotten gym bag. Analyze it. Look for patterns — do multiple people mention the same thing? Maybe your editing is too choppy, or your best plays are buried in the middle where nobody sees them. That’s your cue to fix it.
- Be open-minded: It’s tough not to get defensive, but remember, every critique is a stepping stone.
- Prioritize: Not all feedback is gold. Some might just be personal taste, so focus on what truly enhances your reel.
- Experiment: Use feedback as a testing ground. Try new edits, different music, or rearrange clips to see what works.
Here’s a little secret — sometimes, the best feedback comes from unexpected places. Maybe that casual fan who barely knows the rules spots something you missed. Keep your ears open, and don’t be afraid to ask why they think something doesn’t work. Understanding the “why” can be a game-changer.
And hey, remember, feedback isn’t a one-time thing. It’s a cycle. Post, listen, improve, repeat. Your highlight reel will evolve just like your skills on the field. So, next time you’re tempted to just upload and forget, think again. Grab that feedback, roll up your sleeves, and get ready to blow everyone away with your next reel. Because, at the end of the day, the best players are the ones who never stop learning.
Real-Life Success Stories
Alright, let’s get real for a moment — highlight reels aren’t just flashy clips for Instagram likes or bragging rights at the local bar. They can be game-changers for amateur players dreaming of that big break. You might be thinking, “Yeah right, just a video?” But trust me, some of the most unexpected success stories started with nothing more than a few well-edited clips showing off raw talent and hustle.
Take, for example, the story of Jake Thompson, a high school basketball player from a small town who didn’t have scouts knocking down his door. Instead of waiting around, Jake grabbed his phone, recorded his best plays, and stitched together a highlight reel that screamed “Look at me!” Within weeks, that reel caught the eye of a college coach scrolling through endless footage. Next thing you know, Jake’s signing a scholarship offer. No fancy agents, no expensive cameras — just a smart, well-crafted video and a little grit.
- Lesson 1: You don’t need Hollywood production quality to get noticed.
- Lesson 2: Timing and sharing your reel strategically matters — Jake sent his reel right before the recruitment season.
- Lesson 3: Authenticity wins — showcasing your genuine skills beats over-the-top flashy edits every time.
Now, don’t get me wrong — not every reel turns into a fairy tale. But the point is, a good highlight reel can open doors you didn’t even know existed. Consider Maria Lopez, an amateur soccer player who was stuck playing weekend leagues with zero exposure. She took the plunge, made a highlight video focusing on her speed and ball control, and posted it on multiple platforms. One day, a semi-pro team’s scout stumbled upon her reel on a social media group and invited her for a trial. That reel was her ticket out of obscurity.
| Player | Sport | How Reel Helped | Outcome |
|---|---|---|---|
| Jake Thompson | Basketball | Showcased skills to college coach | Received scholarship offer |
| Maria Lopez | Soccer | Posted on social media, caught scout’s eye | Invited to semi-pro team trial |
| Chris Nguyen | Football | Shared reel with local club | Signed to amateur league |
Then there’s Chris Nguyen, who wasn’t exactly the star player but had a knack for making clutch plays. His reel wasn’t about flashy dunks or record-breaking runs; it was about consistency and heart. By sharing his reel with a local football club, he landed a spot on their roster. It’s proof that highlight reels don’t have to be perfect or flashy — sometimes showing your grit and game IQ is enough.
So, what’s the takeaway here? If you’re an amateur player, don’t sleep on the power of a solid highlight reel. It’s not just about the plays you include — it’s about telling your story, showing your passion, and making sure the right people see it. And hey, if those reels can help players like Jake, Maria, and Chris get a foot in the door, what’s stopping you?
- Pro Tip: Always keep updating your reel as you improve.
- Pro Tip: Don’t hesitate to ask for feedback from coaches or peers.
- Pro Tip: Share your reel on multiple platforms — you never know who’s watching.
In the end, a highlight reel is just a piece of the puzzle, but it’s one that can change your game — sometimes in ways you never imagined.
Frequently Asked Questions
- Why is a highlight reel important for an amateur player?
A highlight reel acts like your personal sports resume. It showcases your best moments and skills, making it easier for coaches and scouts to see your potential without watching entire games. Think of it as your spotlight—without it, your talent might stay hidden in the crowd.
- What should I focus on when planning my highlight reel?
Planning is key! Focus on capturing moments that truly represent your strengths and unique style. Avoid cluttering your reel with every play; instead, pick those jaw-dropping, game-changing moves that scream “look at me!” It’s quality over quantity, always.
- Do I need expensive equipment to create a good highlight reel?
Not at all! While fancy gear can help, a smartphone with decent camera quality and good lighting can do wonders. The secret sauce lies in angles, steady shots, and clear footage rather than breaking the bank on equipment.
- How long should my highlight reel be?
Keep it short and sweet—aim for around 2 to 3 minutes. Long reels can bore viewers and dilute your impact. Remember, your reel is like a trailer to a blockbuster movie: it should leave them wanting more, not checking their watch.
- Can I add music and effects to my highlight reel?
Absolutely, but with caution. Music and effects can elevate your reel’s vibe and energy, but too much can distract from your actual skills. Choose tracks that pump up the excitement without overshadowing your performance.
- What common mistakes should I avoid in my highlight reel?
Steer clear of shaky footage, irrelevant clips, and over-editing. These can make your reel look amateurish and turn scouts off quickly. Keep it clean, focused, and authentic to your style.
- Where should I share my highlight reel for maximum exposure?
Social media platforms like YouTube, Instagram, and Twitter are great starting points. Also, consider sports-specific websites or sending direct links to coaches and recruiters. The goal is to get your reel in front of the right eyes.
- How can I improve my highlight reel over time?
Don’t just post and forget. Ask for feedback from coaches, teammates, or even friends. Use their insights to refine your next reel—think of it as leveling up your personal highlight game with every edit.


